vrCAVE Standalone Remote Setup
vrCAVE can be setup relatively easily for events or team building. These intructions will go over the best pratices in setting up vrCAVE in a temporary location. These instructions assume that vrcave has already been fully set up, You can find the guide on how to fully set up vrcave here
Hardware Requirements
-
Meta Quest Headset with Controllers
- Recommended 5 sets (plus 1 backup)
- one USB-A to USB-C sync cable
-
Windows Gaming Laptop
- OS: Windows 10
- CPU: anything above a PassMark Score of 7,700
- Graphics: anything above a PassMark Score of 8,800
- RAM 8Gb minumum, 16GB or more recommended
- Peripheries: Ethernet port, ports for mouse, keyboard, and monitor
-
Router
- Netgear Nighthawk X6 R8000 Tri Band Gigabit Wireless Router (or similar)
-
Various Equipment
- Tape Measure
- Painters tape
Headset Settings
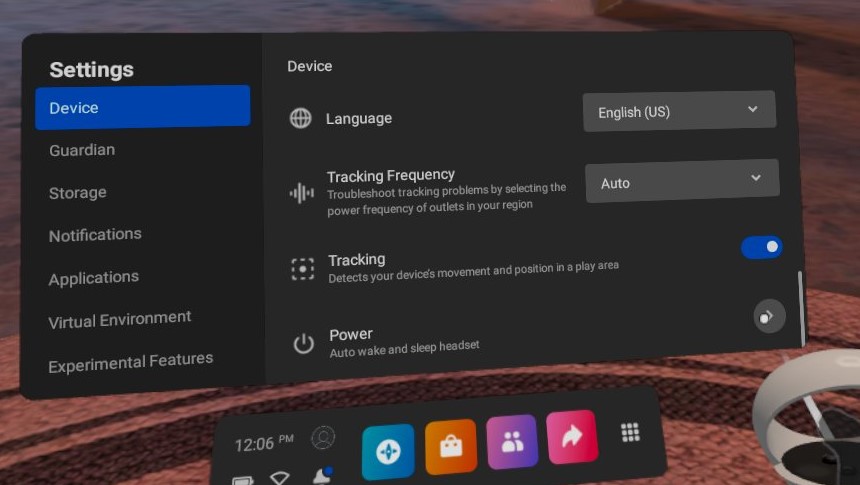
- To help get ready for sessions and to easily verify calibration, it is best that you set the sleep timer on the headsets to something above 2 minutes. Otherwise as soon as you take off the headset, it will immediatly go to sleep and will no longer show up on the server.
-
In the Quest, go to the settings menu and scroll down to the bottom of the devices options.
-
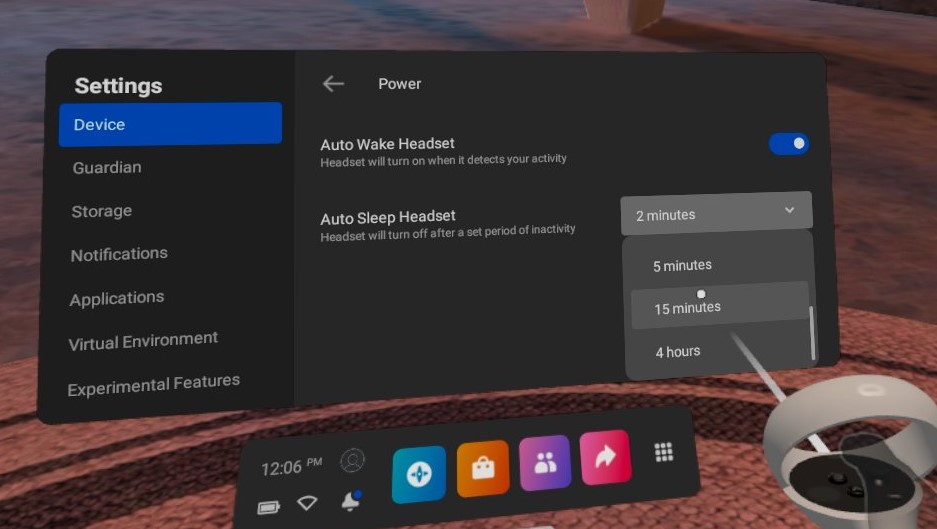
in that menu you will find a dropdown for Auto Sleep Headset Change that to 15 minutes. this will give the headset plenty of time to sit while not being too long as to drain the battery if accidentally left on.
Room Requirements
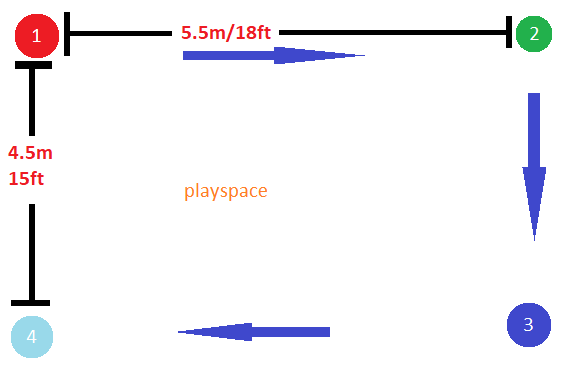
vrCAVE requires a play space of 4.5M x 5.5M (15’x18’) . We recommend having at least an additional 50cm (20”) of buffer beyond this to reduce the danger of bumping into walls. Measure the space and mark the corners of the play space to improve the accuracy of the calibration.
Make sure your Quest’s guardian boundary is set up so you can walk freely around the entire 4.5 x 5.5 meter space.
Achieving Optimal Tracking
A brightly lit room is important for the Quest’s tracking, however direct sunlight should be limited as much as possible. Meta Quest also requires some room features to help with its visual insight tracking, posters or banners should be enough for the walls, the floor may be a bit more complicated. An example of a good tracking floor is a carpet with a non-symetrical design or carpet tiles of different colors. If that isn’t possible, you can also mark the floor with some painters tape or duct tape. as long as the markings are non-symetrical and visible when viewed in the Quest headest guardian boundary cameras the Quests shouldn’t have any troubles tracking.
(These suggestions are subject to change as Oculus continues to develop Inside-Out Tracking.)
Setting up the playspace
-
First thing you will want to do is measure out a 5.5m by 4.5m (18f by 15ft) space and mark the corners of this space with tape. the marked corners will make calibration much easier and more accurate.
-
Set up a table near the playspace with enough room on it to hold all the headsets, the server laptop, and the router. Place the headsets on the table in a row facing the playspace, then setup the Oculus chargers and plug in the headsets.
-
Set up the laptop and router, plug the laptop into one of the routers numbered ports with an ethernet cable.
-
Draw the guardian bounds for each headset encompasing the marked playspace, make sure to also include the charging station for the headsets, this will make sure the headsets stay connected to the server when taken off to charge.
Connect Headsets to the server
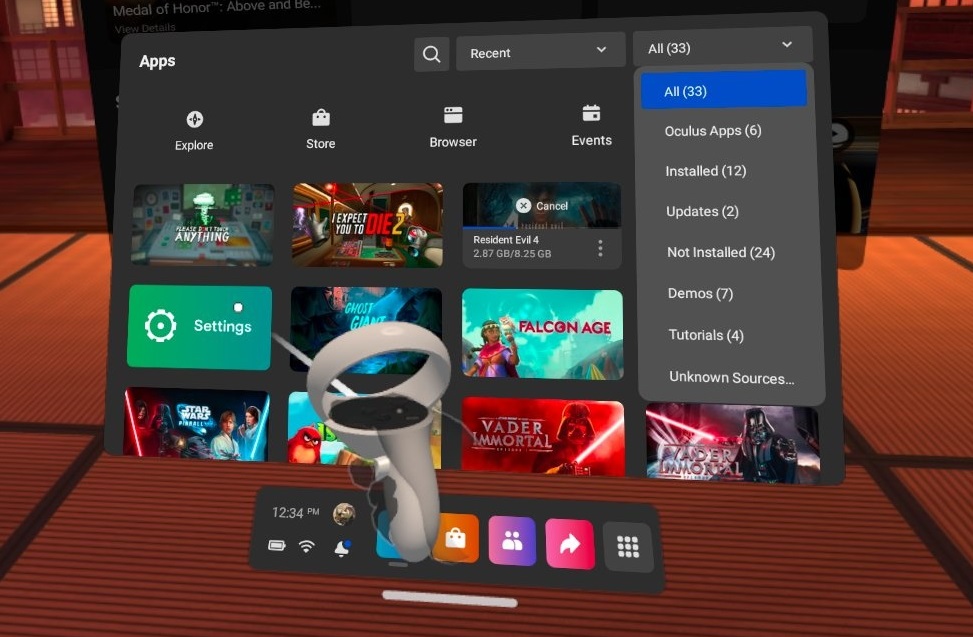
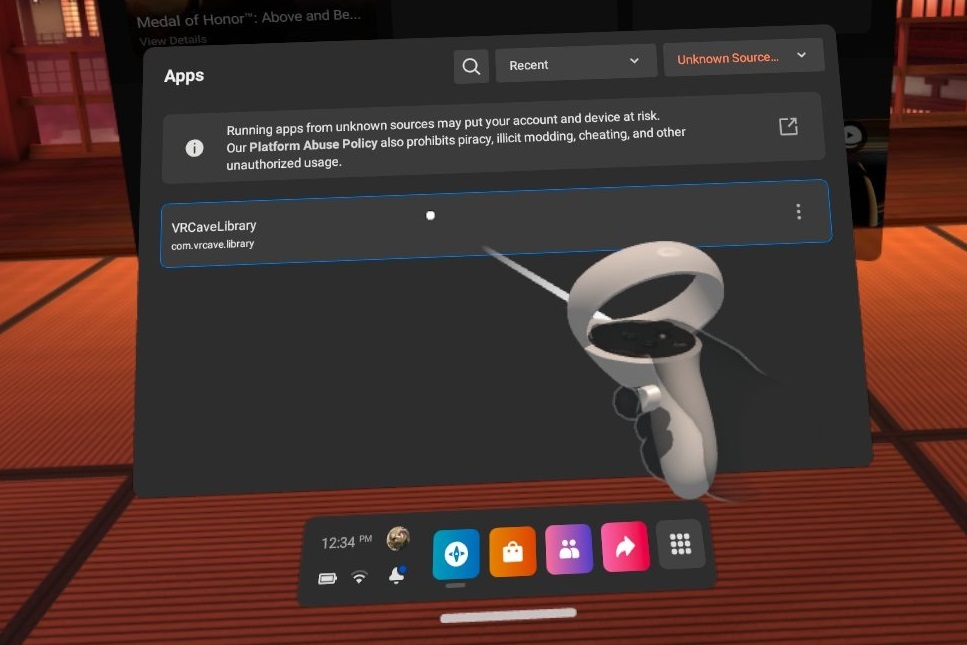
For each headset: In VR, from the main menu bar at the bottom of the screen, click on the App Library button, In the Library window, click on the All dropdown on the top right of the window. select the Unknown Sources category, click on VRcaveLibrary to launch it. 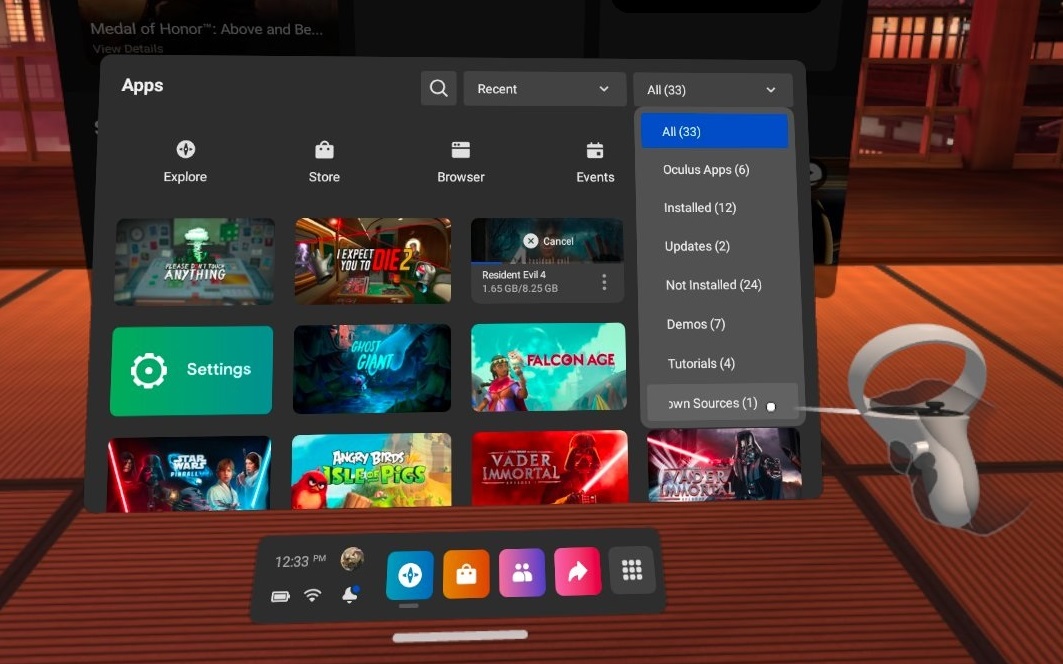
Wait for the headsets to join the server and then plug them in to the charging station, while the headsets are still pointed at the playspace.
Calibrate the Headsets
-
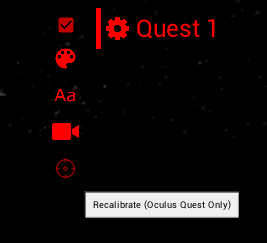
To make sure that each player is where they are supposed to be in game, you will need to perform a calibration on each headset, you can start the calibration from the server by clicking on the gear next to the player name and then clicking the crosshairs that appear when the gear is clicked.
-
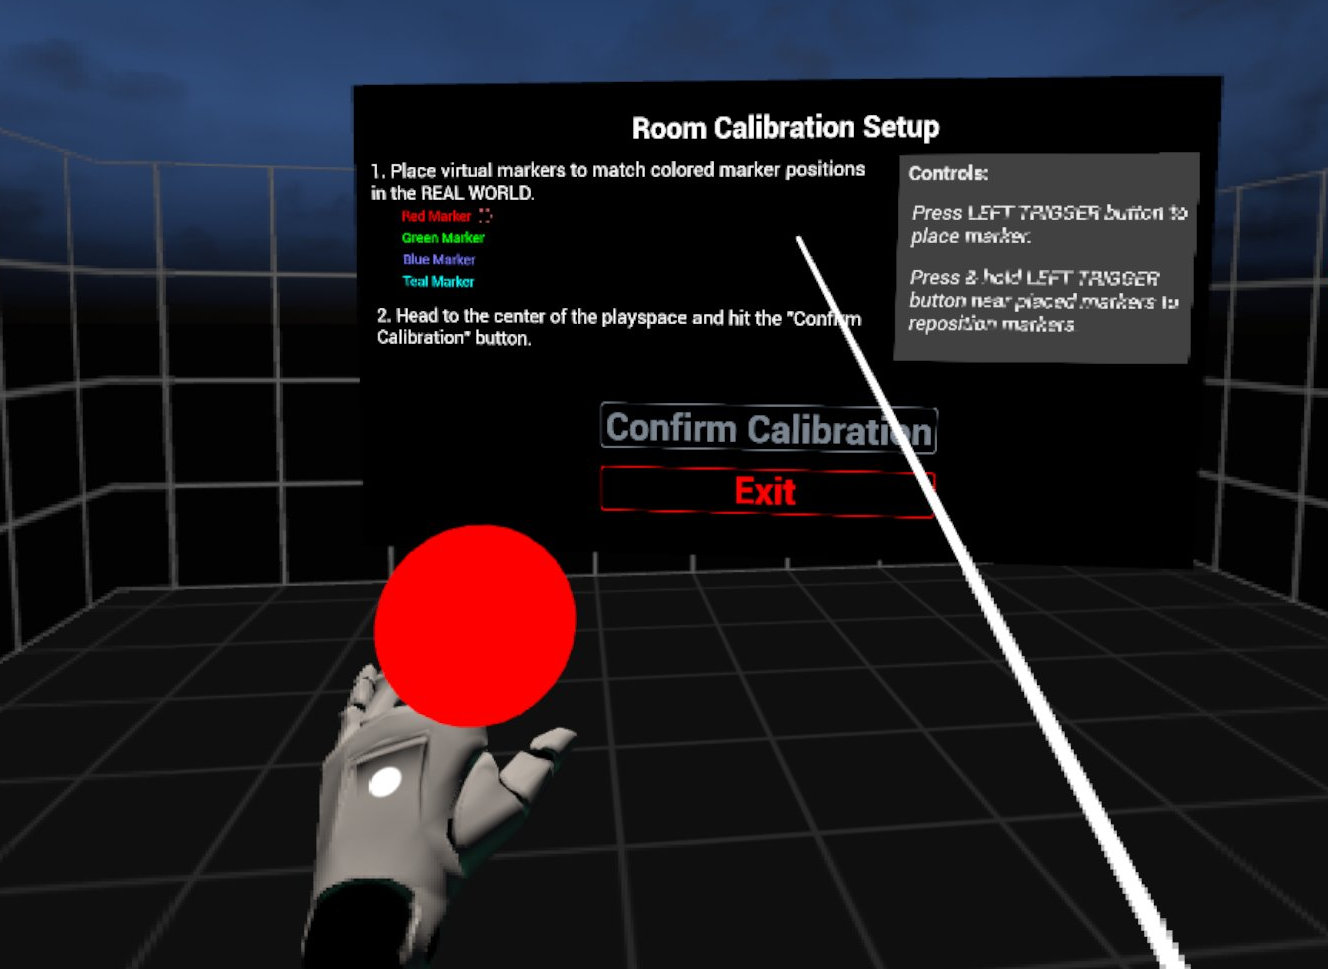
In the selected headset, you will see the calibration window pop up and a red ball attached to the left hand.
-
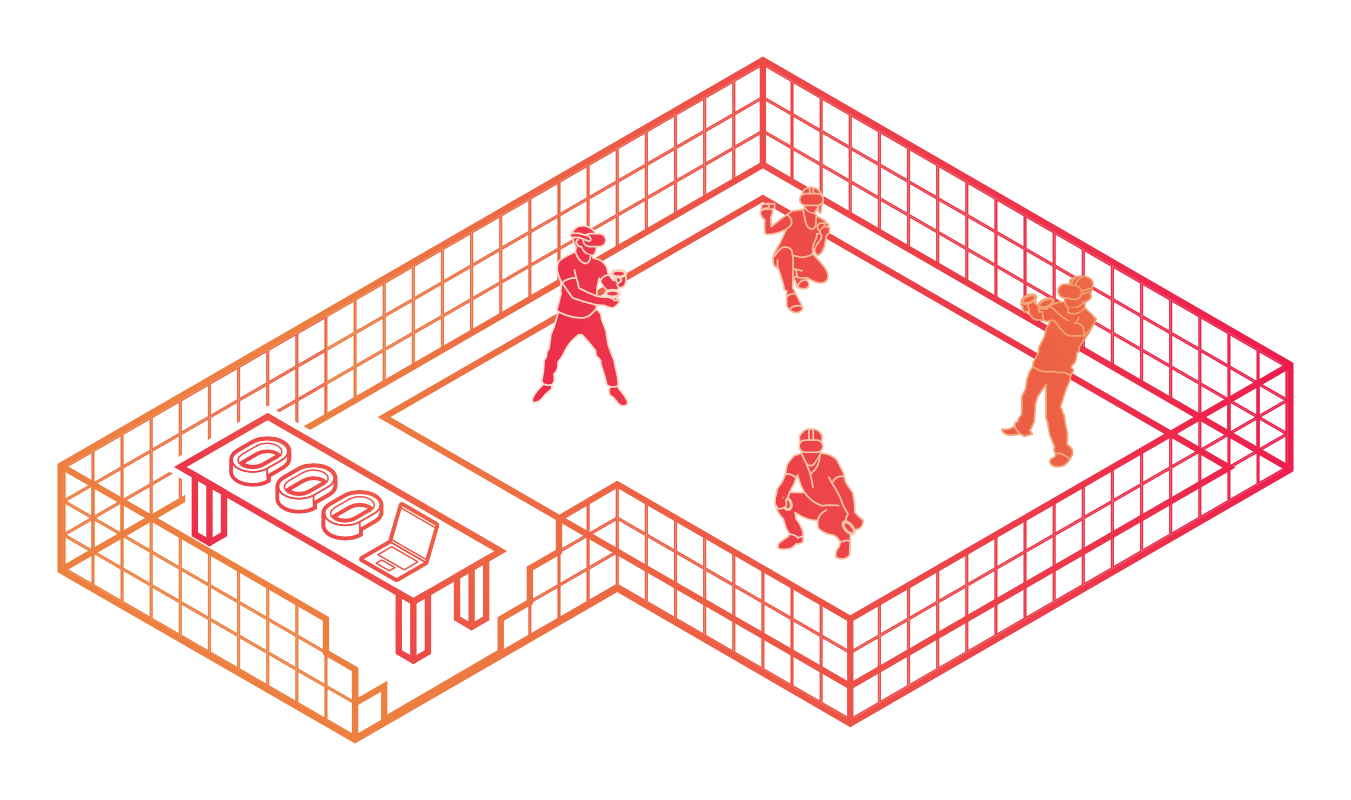
You will need to touch the controller to all 4 corners of the room like the diagram below, It helps to mark out the corners with numbers so the first corner can be quickly identified when calibration needs to be done.
-
When you are done, point the laser pointer on the right hand at the Confirm Calibration button, the play area should visibly shift into position, you can test the calibration by performing a “high five” with another player who is calibrated in the game, you will know the calibration worked if the controllers clack against each other when your hands are close to each other. If the hands connect in game but miss In real life (or using the professional VR Developers term: “Meat Space”) then the calibration was not successful and one or both of the players needs to calibrate again.
Ready to Play
- When all the headsets are on the server and appear where they are supposed to be on the server, Your setup is ready to play.