Room Setup
-
First thing is we are experimenting with some new tracking technology, so please ignore all the floor patterns and markers on the wall. the only tape marking that matters is the corners.
-
After adjusting your lighthouses to be pointed at the center of the play area.
-
First step would be to try and measure 4.5m by 5.5m. those are the dimensions for each games playable area.
-
Marking the corners of your space will help during the room setup.

- Place the backpacks in the center and turn them on (this is a good practice to do when starting them up before play)

-
Start the room setup and follow the steps, when it asks for pointing at the monitor, point the controller at one of the 5.5m walls. (in the picture above, it would be the direction the red headset is pointed.)
-
During the floor calibration, place the controller near the edge of the play area with the trigger pointing up and the bottom of the tracking ring pointed at one of the lighthouses. if your floor calibration progress bar goes without stopping then the calibration was good.

-
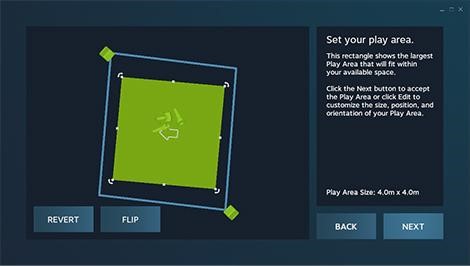
Next, when it asks for you to trace your space, you will need to select advance mode
-
when you trace out your play space, you will want to place the controller on the marked corner of the 4.5x5.5 space you marked out as so. make sure to not block the controller from the view of the lighthouses.

-
when you are done, the bound should look like this, arrange the arrow so it is opposite of the monitor.