Mic Chat Setup
Before setting up the server, The server computer should have a static IP. You can find out how to do that HERE
Server Configuration
-
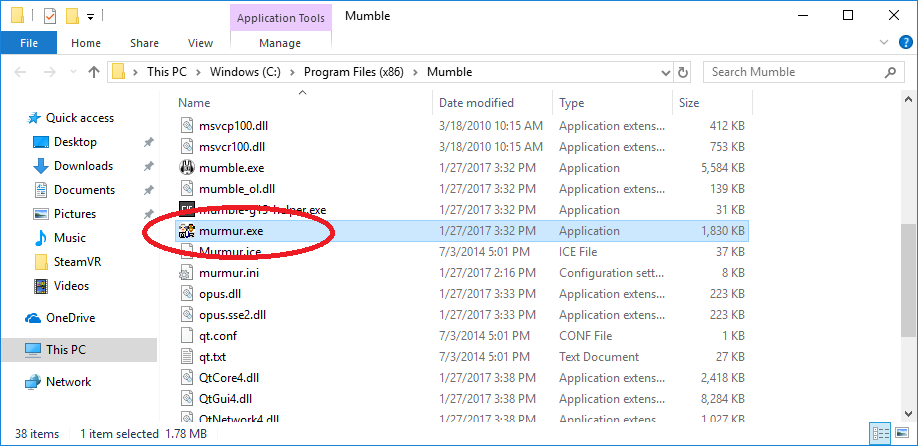
Open the
vrcavefolder on your Desktop. -
Open the
Mumblefolder insidevrcave -
Double click murmur.exe
-
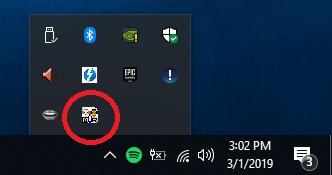
That’s it. this computer is now running a mumble server, you can verify by checking for this icon:
-
Add a shortcut for murmur.exe to the desktop so the server can be quickly started.
-
Add a shortcut of the MumbleServerStartup.exe to your shell:startup by clicking the windows button, typing run, pressing enter and entering shell:startup in the run application
-
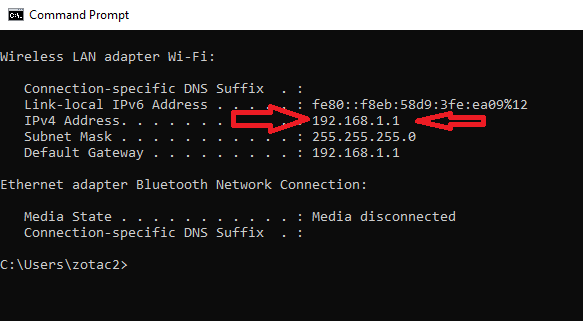
Open a command prompt, this can be done in the windows search by by typing cmd and pressing Enter
-
Type ipconfig and press Enter
-
Record the IVP4 for your server computer so the client backpacks can connect to it.
-
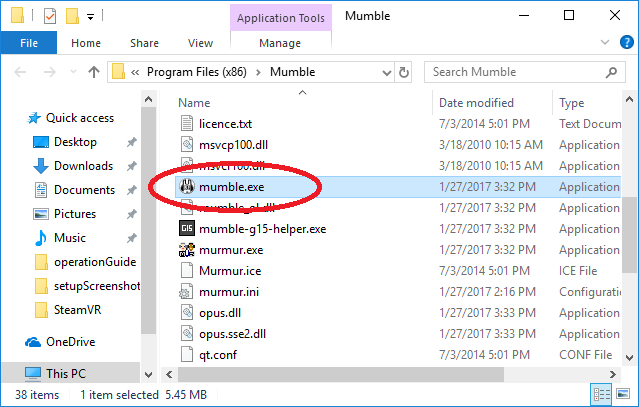
Open the
vrcavefolder on your Desktop. -
Open the
Mumblefolder insidevrcave -
Double click mumble.exe.
-
First time this is opened it will start the Audio Wizard, if this does not open, you can start it by clicking here:
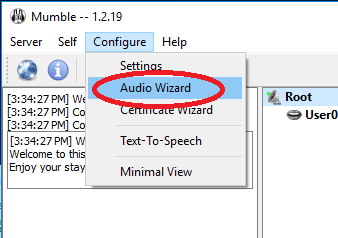
-
On Device Selection you will want to select default device for input and output, and uncheck these boxes.
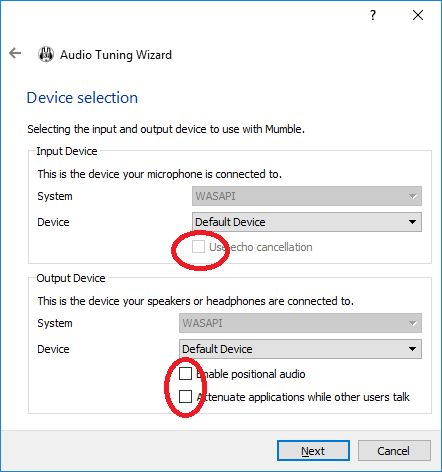
-
On Device Tuning you will want to set the dial as low as possible. 20ms is best.
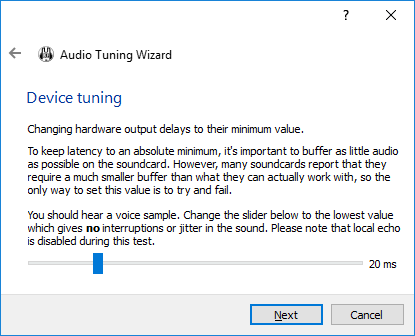
-
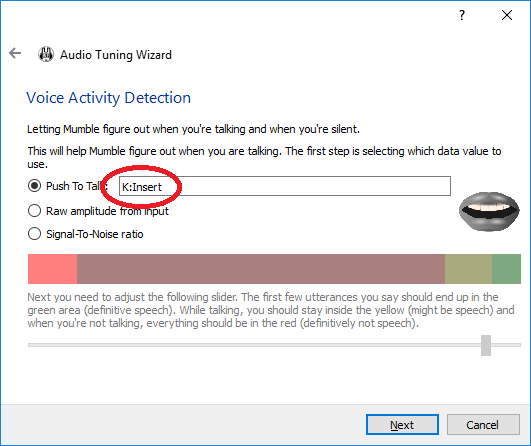
On Voice Activity Detection you will want to set Push To Talk to a key of your choice, you can do this by clicking the box and then pressing the desired key. (for example this currently has Insert as the push to talk button.
-
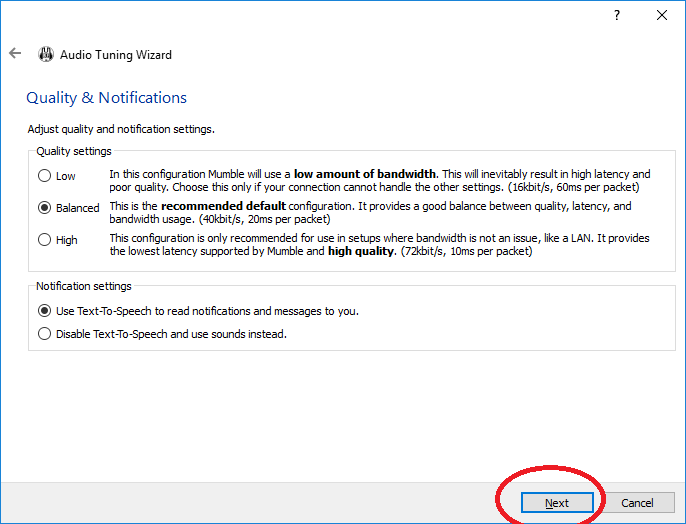
On Quality & Notifications you will want to leave Text-To-Speech on, this will talk to you when something happens, this is only temporary and we will disable it later.
-
when a screen comes up asking about Certificate Authentication, Select Automatic certification creation
-
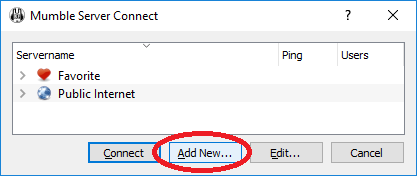
If the network settings don’t show up right away, Select the network icon, the Blue earth with lights and lines
-
Ignore the Public Internet if present, click Add New
-
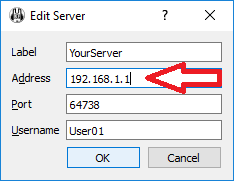
Here the only really important box is Address type in the address you recorded of your server and make a user name for your server. Don’t touch Port.
-
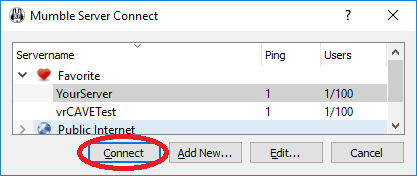
Select the newly created favorite server and Connect
-
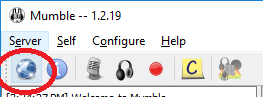
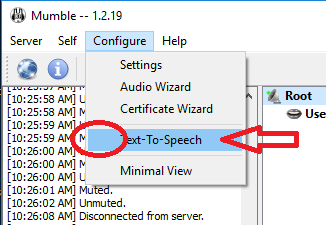
The server will talk to you, we can (and should) disable this here. select configure and uncheck the Text-To-Speech option, this will silence the notifications entirely.
-
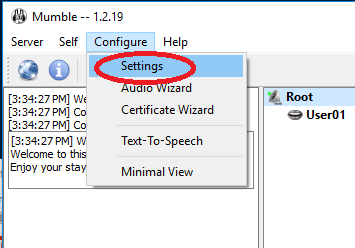
Next you have to go to Configure and select Settings
-
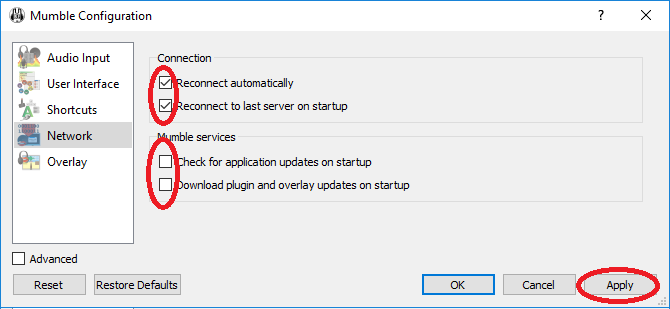
Select Network and under Connection check both boxes and under Mumble Services uncheck both boxes. click Apply
Now the server should automatically join this VOIP chatroom on start up.
-
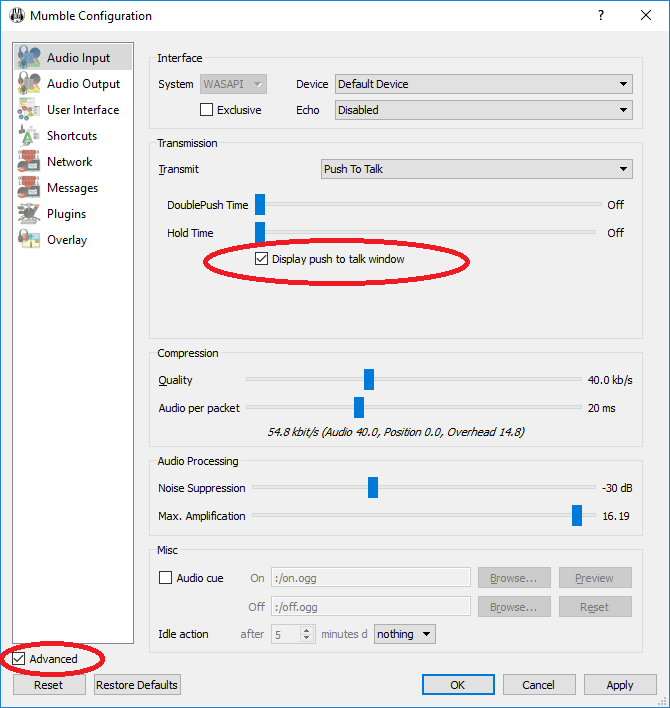
(OPTIONAL) Select Advanced and check Display push to talk window. this will create a button that will always be on top of the screen that can be clicked to talk for the administrators.
Backpack Configuration Setup
Each backpack needs some additional setup
You must install and initialize the server computer before the backpacks.
For these steps you’ll need to connect a keyboard, mouse, and monitor to the backpack, as well as the HTC Vive.
Ensure the HTC Vive is connected and working. Since VRcave should have automatically started up, press Alt+F4 to close VRCave and return to the desktop.
-
Open the
vrcavefolder on your Desktop. -
Open the
Mumblefolder insidevrcave -
Double click mumble.exe.
-
First time this is opened it will start the Audio Wizard, if this does not open, you can start it by clicking here:
-
On Device Selection you will want to select default device for input and output, and uncheck these boxes.
-
On Device Tuning you will want to set the dial as low as possible. 20ms is best.
-
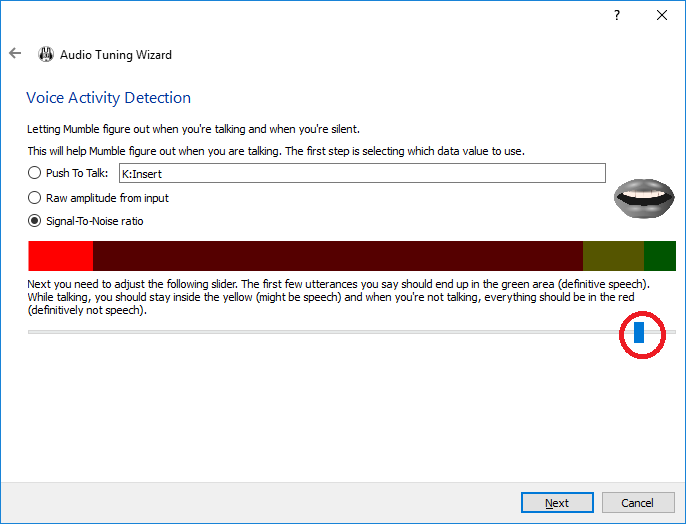
On Device Selection you will want to set Signal-To-Noise ratio and test each headset for voice pickup, adjust the dial so your voice activates green. don’t be shy, be as loud as you think players will get.
-
On Quality & Notifications you will want to leave Text-To-Speech on, this will talk to you when something happens, but we will disable it later.
-
when a screen comes up asking about Certificate Authentication, Select Automatic certification creation
-
If the network settings don’t show up right away, Select the network icon, the Blue earth with lights and lines
-
Ignore the Public Internet if present, click Add New
-
Here the only really important box is Address type in the address you recorded of your server and make a user name for each backpack. don’t touch Port. I don’t know how that works just leave it.
-
Select the newly created favorite server and Connect
-
The server will talk to you, we can (and should) disable this here. select configure and uncheck the Text-To-Speech option, this will silence the notifications entirely.
-
Next you have to go to Configure and select Settings
-
Select Network and under Connection check both boxes and under Mumble Services uncheck both boxes. click Apply
-
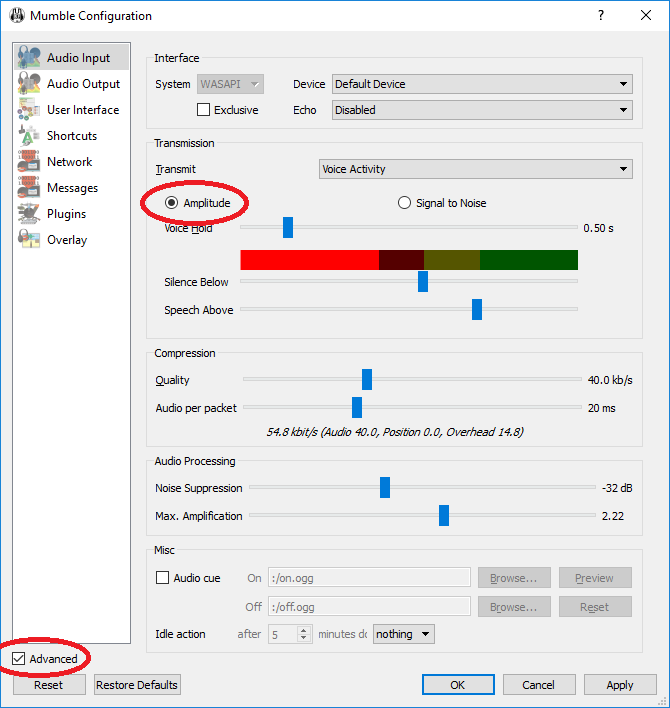
Next click the advanced checkbox and go to Audio Input. Under Transmission you will want to select Amplitude radio button and adjust the Silence Below and Speech Above bars to your microphone input. This helps with cutting down on echos in speech.
Now each backpack should automatically join this VOIP chatroom on start up.