Pico Device Manager Setup Guide
While not strictly necessary for LBE Operation, the Device Manager can help deploy maps and apps on multiple devices more efficient.
Registering a Business with Pico (Full Setup Steps)
This is not required to use LBE mode, however it does make managing multiple headsets easier
-
We highly recommend Using an Enterprise version of the Pico headsets that provides LBE features that are designed for shared space multiplayer, mainly the ability to create a playspace map that will be shared with all the headsets, This means the headsets won’t require calibration. The first year of using the enterprise features are free, you will then need to sign up for a subscription to continue to use it.
-
Go to https://business.picoxr.com/ and click on the profile icon on the top right and click log in.
-
When prompted to choose your platform, select PICO Business Device Manager
-
Click on Sign Up Fill in your email and country, then click Send Code to have a code sent to your email. Once you have entered the code they send to your email, it will ask you to set a password, go ahead and complete the signup.
-
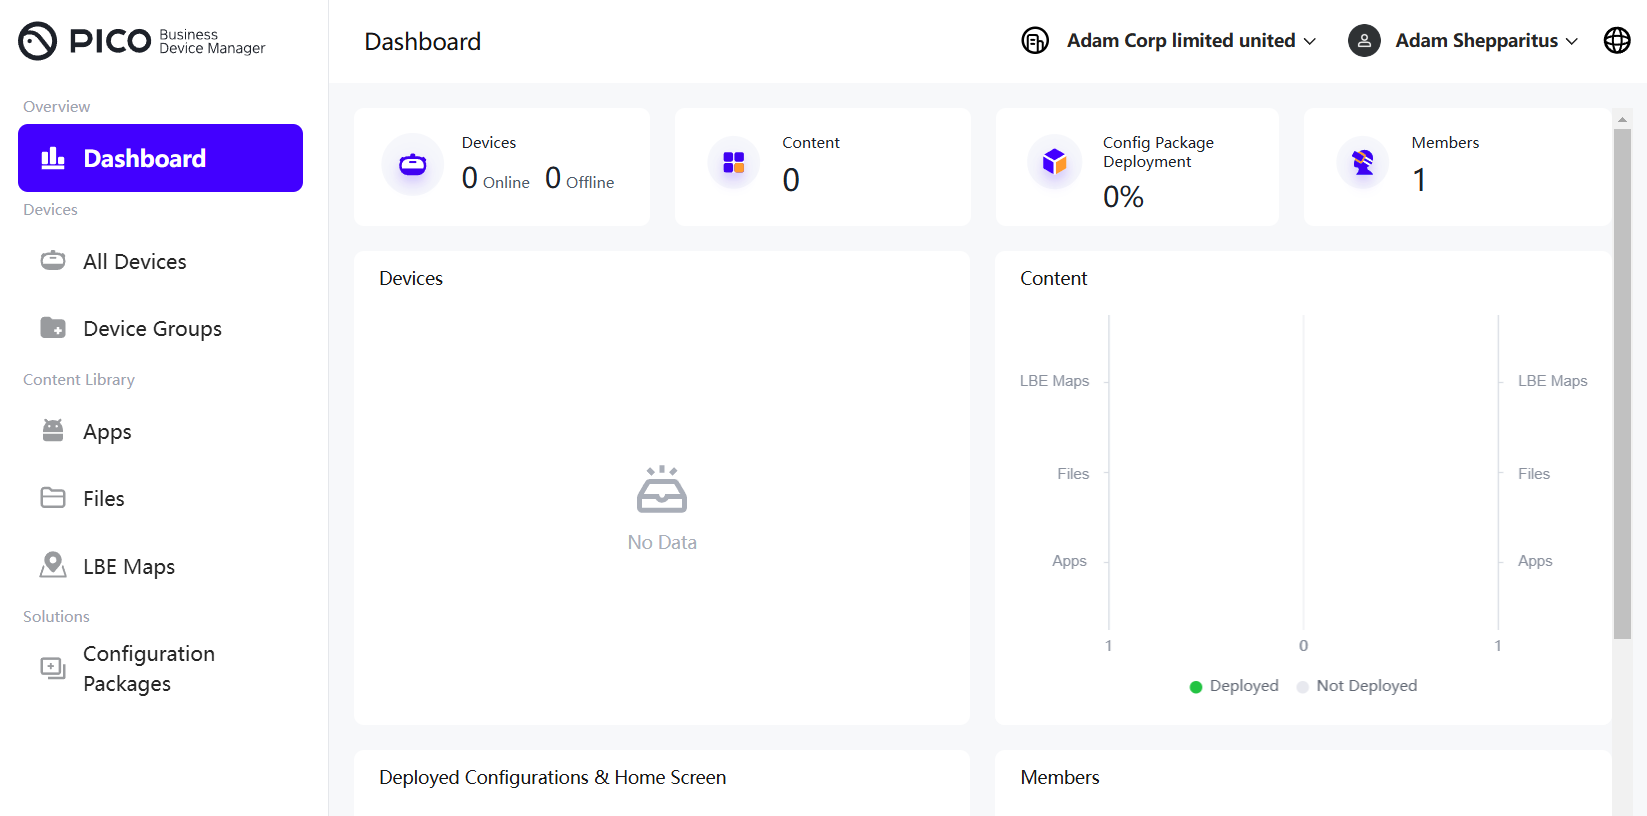
Once you are logged in. Click on the Device manager tab at the top of the page. It will likely send you to an organization only console that does not allow you to manage any devices. To get to the correct page, go to the URL and remove the dash and two letters after console.

- Once you are on the correct page, go to All Devices to begin enrolling your headsets. You will need the headsets Serial Number (SN) to enroll it, you can find that in the headset settings about page.
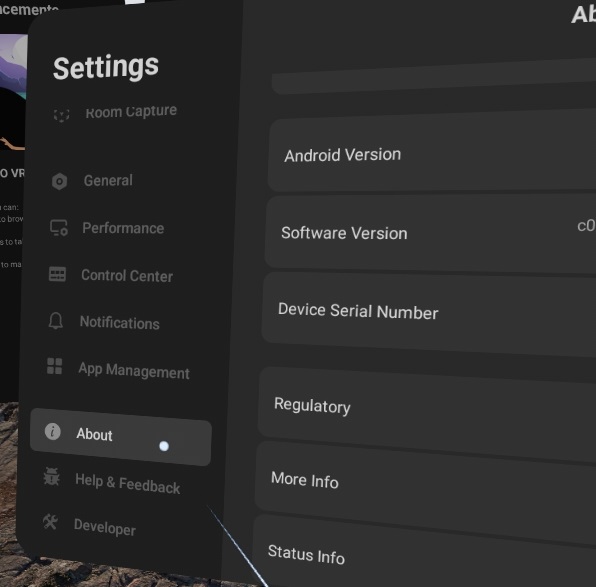
- While you are in the About section of the settings, you can unlock the Developer settings by clicking on the software version ten times.
Deploying vrcave through the Device Manager
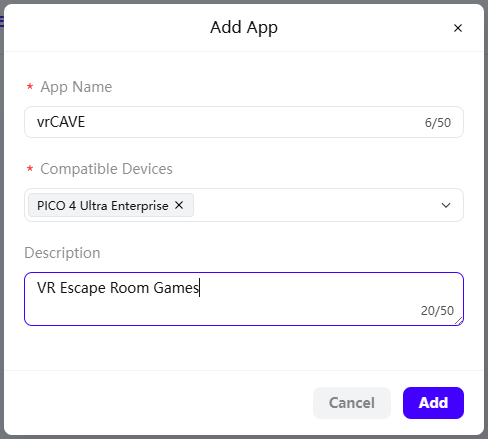
- From the Device Manager page, Click on Apps.

- Click on Add to create an app. Fill in the required information.
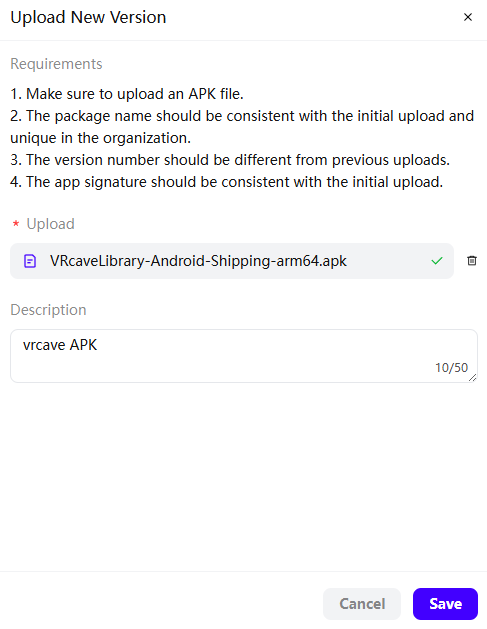
- Click on Upload New Version
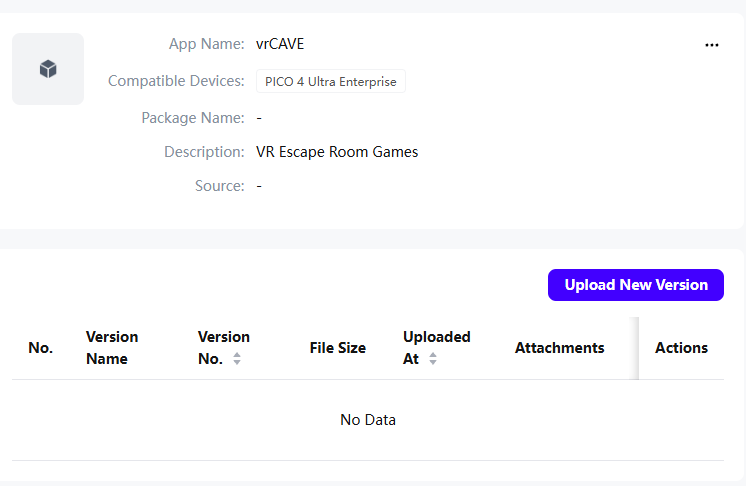
- Upload the VRcaveLibrary APK file. This should only take a few seconds to upload.
- Go to the Files section on the left panel, then upload the main.1.com.vrcave.library.obb to the Device manager Files section. This will take a while to upload as it is the bulk of vrcaves files.
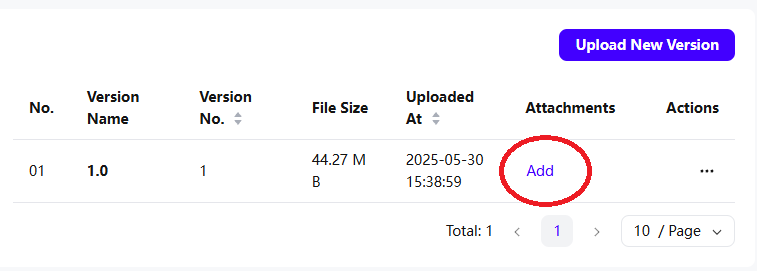
- Once the OBB has uploaded, go to the new App version, click on Add for the Attachments. You will need to create the folders so that the obb file is uploaded in Android/obb/com.vrcave.library. To do this, you will have to click + New and type in the file name, click create, and then open the newly created folder to make the next. In the end it should look like this:
-
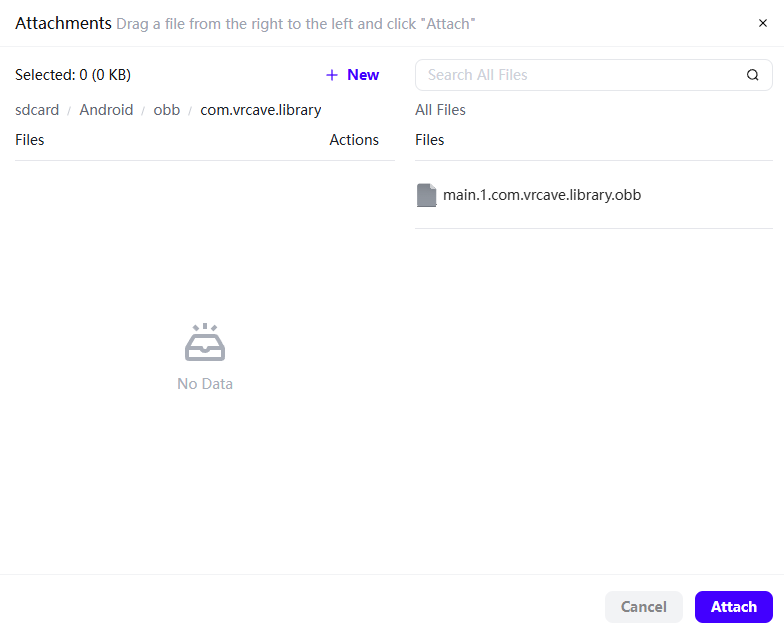
Drag the OBB file on the right into the com.vrcave.library folder and then click attach.
-
Now that the App has been created, go to your Devices or Device group, click on the content tab, and deploy vrcave. After a few minutes, it should load into your headsets.